Rustic No-Knead Bread
Rustic No-Knead Bread – a simple, delicious, and satisfying bread recipe perfect for beginners and skilled baker alike!
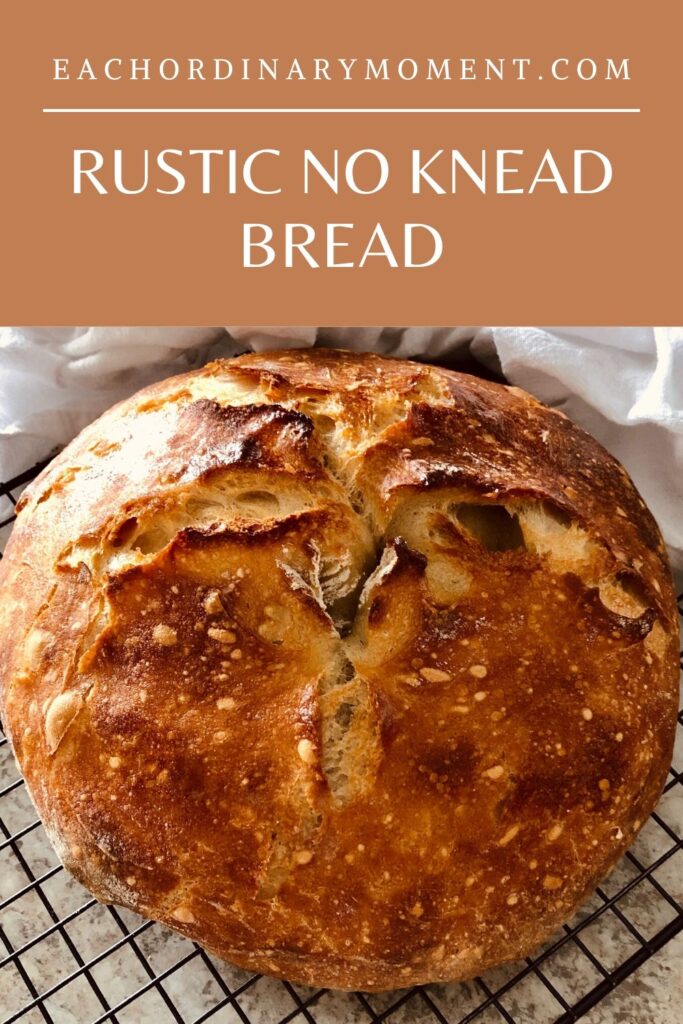
This crusty, delicious bread that goes by so many tasty names (peasant bread, hearty bread, easy artisan bread, overnight bread, and so on!) is popular for a reason: it is so simple to make and is delicious and satisfying. The actual hands-on time is minimal, but it does need to sit and rise on the counter for at least eight hours, or overnight (and some people let it sit for 24 hours before baking), so you do have to plan a little bit ahead of time if you want it for a specific meal.
This post may contain affiliate links for products we think you’ll find useful. You can read our full disclosure here.
For years, I struggled with menu planning. I’m happy to report that I’ve finally come up with a system that works for my family and me. One benefit to having a structured menu plan is that it makes it so easy to incorporate foods like this Rustic No-Knead Bread because if I know that I am making a stew or chili the next day, I can stir up a batch real quick before going to bed at night, and then bake it sometime the next day in time for the meal I’ve planned.

Here are few important things to note before you start baking Rustic No-Knead Bread:
Though this bread is simple to make, there are a few things that you need to know before you get going. Firstly, it’s pretty important to the success of this bread that you bake it covered for the first 25 minutes. An enamel Dutch oven works beautifully for this, but if you don’t have one you can substitute a regular stainless steel lidded pot, or even cook this on a baking sheet and cover it with a large oven-proof bowl.
Second, I always use quick-rise yeast, and that is what I call for in this recipe. I’ve seen others that use regular yeast and have good results, but I haven’t personally tried that, so I can’t vouch for the success of the bread using regular yeast versus quick rise. I just always have quick rise (or rapid rise) yeast on hand as I also like to make bread in my bread machine, and I definitely found that I have much better success with my bread rising in that case!
—->You may also love this recipe for Honey Flax Wheat Bread!
Also, I’ve only made this bread with white, all-purpose flour. I don’t think that it is necessary to use the more expensive bread flour that you would typically use for better results with regular bread. Also, I know some people have tried making this recipe with whole wheat with varied results. If this is your first time making this type of bread, I would recommend sticking with the basic recipe, and getting creative from there once you are confident with how your bread has been turning out.

Ingredients You’ll Need for making Rustic No-Knead Bread:
3 cups all-purpose flour, plus more for shaping
1 ½ cups very warm tap water (but not hot)
1 teaspoon salt
1/2 teaspoon yeast
Cornmeal for sprinkling on bottom of Dutch oven (optional, but will help keep the loaf from sticking to the pot while baking)
Directions For Rustic No-Knead Bread:
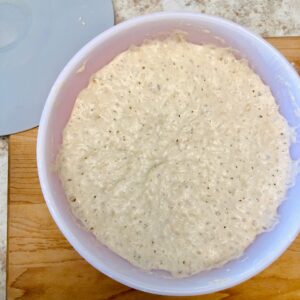
1). Place all the ingredients into a large mixing bowl. Stir together until a soft dough forms. It should appear more moist than regular bread dough, but not as wet as a muffin batter. If the dough seems dry and flaky, add a little more water, a tablespoon at a time, until a soft dough forms. See the pictures below for a good visual of what you are looking for.
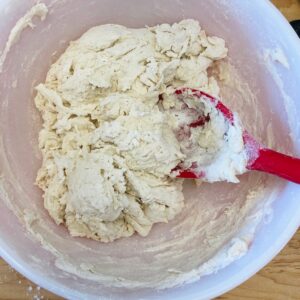

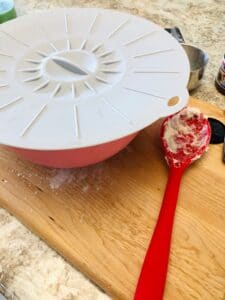
2). Once the dough is prepared, cover the bowl with plastic wrap, a tea towel or I prefer to use these silicone lids. Let the bread rise on your counter overnight, or for at least 8 hours. It will rise and become very bubbly.
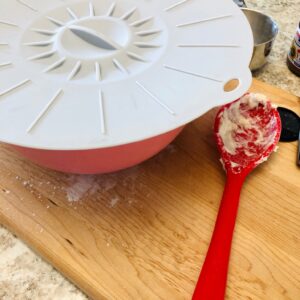
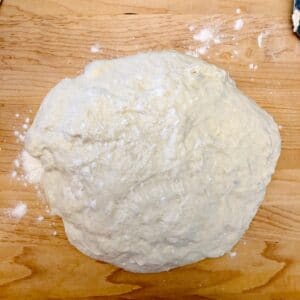
3). When you are ready to bake the bread, take a spoon or butter knife and gently slice through the dough while also scraping it from the sides of the bowl. The dough will sink down and be ready to shape into a ball. Sprinkle your work surface generously with flour, then dump the dough out of the bowl onto your work surface. Sprinkle some more flour on top, and gently shape the bread into a ball. The dough will still be very soft and a little sticky. Don’t worry about having a perfectly smooth loaf. A few bumps are part of the beautiful rustic charm of this bread! If desired, you can use a pair of scissors to cut score marks on the top of the loaf.
4). Cover the dough with the same bowl that it rose in. Let the dough set for 30 minutes on the counter. Meanwhile, heat your oven to 450°. Put your Dutch oven with the lid on into the oven to heat.
5). When the 30 minutes are complete, carefully remove the pot from the oven. It will be very hot! Sprinkle about 1/8th of a cup cornmeal on the bottom of the pot. Carefully transfer the dough into the pot, cover, and place it back into the oven.
6). Bake for 25 minutes, covered. Then remove the lid and bake for another 15-20 minutes. The bread should be a lovely golden color and sound hollow when tapped.
Remove the bread from the pot and immediately brush with butter or oil, if desired. Let it cool uncovered, or cover with a clean tea towel.
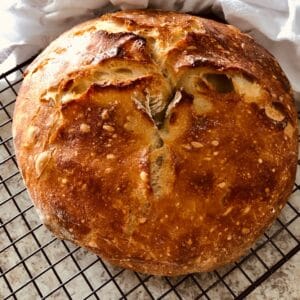
Your loaf will be easiest to slice once it is cool, but I have to admit that it is hard not to sneak a piece while it’s still warm. It’s lovely served fresh, or toasted with butter and jam. It’s also fantastic served with this Creamy Chili recipe!
Enjoy!
Rustic No-Knead Bread
Equipment
- Dutch oven or other large, lidded pot
Ingredients
- 3 cups all-purpose flour plus more for kneading
- 1 ½ cups very warm tap water but not hot
- 1 teaspoon salt
- 1/2 teaspoon yeast
- Cornmeal for sprinkling on bottom of Dutch oven
Instructions
- Place all the ingredients into a large mixing bowl. Stir together until a soft dough forms. It should appear more moist than regular bread dough, but not as wet as a muffin batter. If the dough seems dry and flaky, add a little more water, a tablespoon at a time, until a soft dough forms. See the pictures below for a good visual of what you are looking for.
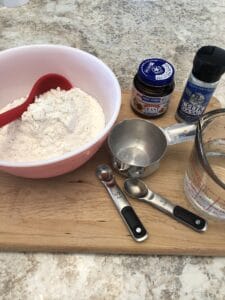
- Once the dough is prepared, cover the bowl with plastic wrap, a tea towel, or silicone lid.
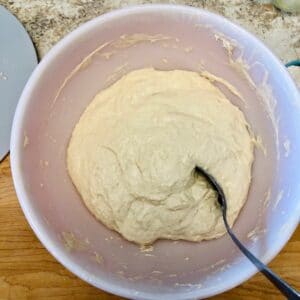
- Let the bread rise on your counter overnight, or for at least 8 hours. It will rise and become very bubbly. When you are ready to bake the bread, take a butter knife and gently slice through the dough while also scraping it from the sides of the bowl. The dough will sink down and be ready to shape into a ball.
- Sprinkle your work surface generously with flour, then dump the dough out of the bowl onto your work surface. Sprinkle some more flour on top, and gently knead the bread several times to help shape it into a ball. The dough will still be very soft and a little sticky. Don’t worry about having a perfectly smooth loaf. A few bumps are part of the beautiful rustic charm of this bread! If desired, you can use a pair of scissors to cut score marks on the top of the loaf.
- Cover the dough with the same bowl that it rose in. Let the dough sit for 30 minutes on the counter. Meanwhile, heat your oven to 450°. Put your Dutch oven with the lid on into the oven to heat.

- When the 30 minutes are complete, carefully remove the Dutch oven. It will be very hot! Sprinkle about 1/8th cup cornmeal on the bottom of the pot. Carefully transfer the dough into the pot, cover, and place it back into the oven.

- Bake for 25 minutes, covered. Then remove the lid and bake for another 15-20 minutes. The bread should be a lovely golden color and sound hollow when tapped.

- Remove the bread from the pot and immediately brush with butter or oil, if desired. Let it cool uncovered, or cover with a clean tea towel.

- Serve fresh, or toasted with butter and jam. Yum!

Notes
I hope that you enjoy making this delicious, sourdough Rustic No-Knead Bread! If you love the recipe, feel free to leave a rating.
Happy Baking!






I want to make this so bad for my husband. His mother used to make something like this when he was a boy. What size Dutch oven do I need to use for this recipe?
Hi Pam, I use a 6 quart Dutch oven, but a smaller one could probably work as well, as long as there is enough room inside the pot for the bread to rise. Happy baking!
Picure looks like you added seeds. True? What did you use and when added
Hi Ellen, no I didn’t add any seeds, but I can see what you mean by the picture looking like the bread has seeds-it’s just the way the air bubbles in the bread baked ?.
Thanks for checking out the recipe!
Cara